Showing posts with label Experience sharing. Show all posts

Troubleshoot Electric Cooling Fan

troubleshoot electric cooling fan
An electric cooling fan that is not coming on when it should can cause an engine to overheat and poor cooling performance from the air conditioner.

ELECTRIC COOLING FAN OPERATION
The electric cooling fan is typically mounted behind the radiator. On some vehicles with large, wide radiators, there may be two cooling fans, or there may be a separate fan for the air conditioning condenser.
The fan only runs when needed to help cool the engine. The engine coolant sensor or a separate engine temperature switch is used to monitor engine temperature. Extra cooling is not needed when a cold engine is first started, so the fan does not come on until the engine reaches normal operating temperature (195 to 215 degrees). The fan will then cycle on and off as needed to maintain the coolant temperature. So the fan runs mostly at idle or low speed when the engine is at normal temperature.
CAUTION: The fan circuits on many vehicles are wired so the fan can come on at any time, whether the engine is running or not. Be aware of this if you are working in the engine compartment and the engine is hot. Keep fingers and tools away from the fan blades.
You may hear the fan running when you shut off the engine after driving. This is normal. But the fan should shut off after several minutes as the engine cools down.
The fan also comes on when the A/C is turned on to provide additional airflow through the condenser for good cooling performance. This may occur regardless of engine temperature or vehicle speed.
The fan is usually not needed when the vehicle is traveling fast enough for ram airflow through the grille to provide cooling (typically at speeds above 30 mph).
WHY ELECTRIC COOLING FANS ARE USED
One reason why electric cooling fans are used on many vehicles in place of a belt-driven mechanical fan is to improve fuel economy and reduce fan noise, especially at highway speeds. A belt-driven fan can consume up to 12 or more horsepower depending on engine speed and cooling load.
ELECTRIC COOLING FAN CIRCUIT
The fan's temperature-sensing power circuit only runs the fan when extra cooling is needed. On older applications, fan operation is usually controlled by a temperature switch located in the radiator or on the engine. When the temperature of the coolant exceeds the switch's rating (typically 195 to 215 degrees F), the switch closes and energizes a relay in the engine comparment that supplies voltage to the fan. The fan then continues to run until the coolant temperature drops back below the opening point of the switch. A separate circuit turns on the fan when the A/C compressor clutch is engaged.
In newer vehicles with computerized engine controls, fan operation is often regulated by the powertrain control module (PCM). Input from the coolant sensor, and in many cases the vehicle speed sensor too, is used by the PCM to determine when the fan needs to be energized. On some vehicles, the PCM may also select between high and low fan speeds to match the engine's cooling requirements.
ELECTRIC COOLING FAN PROBLEMS
A fan failure, or a failure of the fan relay or control circuit is bad news because it can allow the engine to overheat.
Five things may prevent an electric cooling fan from coming on:
  • Defective temperature switch or coolant sensor
  • Engine thermostat is stuck OPEN (engine never gets hot enough to turn on the fan)
  • Failed fan relay
  • A wiring problem (blown fuse, loose or corroded connector, shorts, opens, etc.)
  • Bad fan motor
ELECTRIC COOLING FAN QUICK CHECKS.
One way to quick check the fan circuit is to start the engine and turn on the A/C to max. If the fan runs, the fan motor, relay, fuse and wiring are all okay. But this test doesn't show if the temperature switch or temperature sensor and PCM are energizing the fan when coolant temperatures are high.
To check the temperature at which the fan comes on, turn the A/C off and keep the engine running until it reaches normal operating temperature. Most fans should come on when the coolant reaches about 200 to 230 degrees. If the fan does not come on, something in the control circuit is defective. Resistance checks should then be made on the temperature sensor or switch, and a voltage check on both sides of the relay (you will probably need a wiring diagram of the fan cooling circuit on your vehicle to identify the relay terminals and wiring connections).
The fan motor itself can be checked by using jumper wires. Unplug the wiring connector on the fan, and use the jumper wires from the battery to route power directly to the fan. If the fan motor is good, the fan should spin at normal speed when supplied with 12 volts. Noisy bearings or a slower than normal speed would indicate a worn motor.
Posted on Saturday, July 28, 2012 / 0 Comment / Read More

Why Is My Car Engine Overheating ?

If you've been getting steamed by your engine on a regular basis, your skin may look great, but your blood pressure is probably through the roof. An overheating engine can have a number of causes. Some are as simple as low coolant. Others are more involved and may lead to serious repairs. To better understand what could be causing your engine to overheat, check out some common causes of overheating engines, you'll be glad you did.
engine overheating


Internal combustion engines run on heat. Chemical energy in the fuel is transformed into thermal energy when the fuel burns, which produces mechanical energy to push the pistons, spin the crankshaft and drive the vehicle down the road.
As efficient as today's engines are, they still waste a LOT of the heat energy they produce. The average gasoline engine is only about 22 to 28% efficient. That means over two-thirds of the heat produced by each gallon of fuel either goes out the tailpipe or is soaked up by the engine itself. Diesels squeeze a little more bang out of each buck's worth of fuel with efficiently ratings of 32 to 38%, but even that leaves a lot of waste heat that must be managed and carried away by the cooling system.
Ironically, the hotter an engine runs the more efficient it becomes. But there's a limit because aluminum pistons and heads can only get so hot before they start to soften and melt. The same goes for cast iron. Engineers have been tinkering with exotic ceramic materials and metallic-ceramic alloys in an attempt to build high temperature, super efficient engines. They've realized some significant gains but ceramics are still too expensive for everyday applications.
HOW HOT IS TOO HOT?
Most engines today are designed to operate within a "normal" temperature range of about 195 to 220 degrees F. A relatively constant operating temperature is absolutely essential for proper emissions control, good fuel economy and performance.
A 50/50 mixture of water and ethylene glycol antifreeze in the cooling system will boil at 225 degrees if the cap is open. But as long as the system is sealed and holds pressure, a radiator cap rated at 15 psi will increase the boiling temperature of a 50/50 coolant blend up to 265 degrees F. If the concentration of antifreeze to water is upped to 70/30 (the maximum recommended), the boiling temperature under 15 psi of pressure goes up to 276 degrees.
So does this mean a cooling system with a maximum concentration of antifreeze in the coolant (70%) can run as hot as 276 without boiling over? Theoretically yes -- but realistically no. The clearances in most of today's engines are much, much closer than those in engines built in the 1970s and early 1980s. Piston-to-cylinder clearances are much tighter to reduce blowby for lower emissions. Valve stem-to-guide clearances also are closer to reduce oil consumption and emissions, too. Plus, many engines today have aluminum heads with overhead cams. Such engines don't handle higher than normal temperatures well, and are very vulnerable to heat damage if the engine gets too hot.
Anytime temperatures climb beyond the normal range, the engine is running in the danger zone.
CONSEQUENCES OF OVERHEATING
If the engine overheats, the first thing that will happen is a gasoline engine will start to detonate. The engine will ping and start to lose power under load as the combination of heat and pressure exceed the octane rating of the fuel. If the detonation problem persists, the hammer-like blows may damage the rings, pistons or rod bearings.
Overheating can also cause preignition. Hot spots develop inside the combustion chamber that become a source of ignition for the fuel. The erratic combustion can cause detonation as well as engine run-on in older vehicles with carburetors. Hot spots can also be very damaging and burn holes right through the top of pistons.
Another consequence of overheating may be a blown head gasket. Heat makes aluminum swell almost three times faster than cast iron. The resulting stress can distort the head and make it swell in areas that are hottest like those between exhaust valves in adjoining cylinders, and areas that have restricted coolant flow like the narrow area that separates the cylinders. The typical aluminum head swells most in the middle, which can crush the head gasket if the head gets hot enough. This will cause a loss of torque in the gasket allowing coolant and combustion leaks to occur when the head cools.
Overheating is also a common cause of OHC cam seizure and breakage.
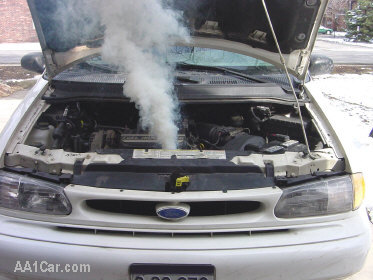
Wait, there's more. If the coolant gets hot enough to boil, it may cause old hoses or an age-weakened radiator to burst under the increased pressure. Pistons may swell up and scuff or seize in their bores, causing serious engine damage. Exhaust valve stems may stick or scuff in their guides. This, in turn, may cause valves to hang open which can damage pistons, valves and other valvetrain components. And if coolant gets into the crankcase, you can kiss the bearings and bottom end of the engine goodbye.
A HOT warning lamp should never be ignored. Though a few high tech cars like Cadillacs with the Northstar engine can disable cylinders to "air-cool" the engine and keep it running at reduced power in the event of coolant loss, most engines will suffer serious damage if they overheat. So advise your customers to stop driving at the first sign of overheating. Turn the engine off, let it cool down and try to find and fix the cause before risking further travel.

CAUSES OF OVERHEATING
Overheating can be caused by anything that decreases the cooling system's ability to absorb, transport and dissipate heat: A low coolant level, a coolant leak (through internal or external leaks), poor heat conductivity inside the engine because of accumulated deposits in the water jackets, a defective thermostat that doesn't open, poor airflow through the radiator, a slipping fan clutch, an inoperative electric cooling fan, a collapsed lower radiator hose, an eroded or loose water pump impeller, or even a defective radiator cap.
One of nature's basic laws says that heat always flows from an area of higher temperature to an area of lesser temperature, never the other way around. The only way to cool hot metal, therefore, is to keep it in constant contact with a cooler liquid. And the only way to do that is to keep the coolant in constant circulation. As soon as the circulation stops, either because of a problem with the water pump, thermostat or loss of coolant, temperatures begin to rise and the engine starts to overheat.
The coolant also has to get rid of the heat it soaks up while passing through the block and head(s). So the radiator must be capable of doing its job, which requires the help of an efficient cooling fan at slow speeds.
The thermostat must be doing its job to keep the engine's average temperature within the normal range so the engine does not overheat. If the thermostat fails to open, it will effectively block the flow of coolant and the engine will overheat.
Your engine may not be overheating at all. Your temperature gauge or warning lamp may be coming on because of a faulty coolant sensor. Sometimes this can be caused by a low coolant level or air trapped under the sensor.
WHAT TO CHECK
engine thermostatBad Thermostat -- Severe engine overheating can often damage a good thermostat. If the engine has overheated because of another problem, therefore, the thermostat should be tested or replaced before the engine is returned to service.
One way to check the thermostat is to start the engine and feel the upper radiator hose (or use an infrared noncontact thermometer to read its temperature). The hose should not feel uncomfortably hot until the engine has warmed-up and the thermostat opens. If the hose does not get hot, it means the thermostat is not opening.
Another way to test the thermostat is to remove it and dip it into a pan of boiling water (it should open). The exact opening temperature can be checked by using a thermometer.
If the thermostat needs to be replaced, install one with the same temperature rating as the original. Most cars and light trucks since 1971 require thermostats with 192 or 195 degree ratings. Using a cooler thermostat (160 or 180) in an attempt to "cure" a tendency to overheat can increase fuel and oil consumption, ring wear and emissions. On newer vehicles with computerized engine controls, the wrong thermostat can prevent the computer system from going into closed loop resulting in major performance and emission problems if the engine fails to reach its normal operating temperature.
TIP: When refilling the cooling system, air can become trapped under the thermostat. This will form a steam pocket that prevents the thermostat from opening and may cause the engine to overheat. Some cooling systems have one or more bleeder valves that can be opened to vent air from the system while refilling the system. If your cooling system does not have a bleeder valve, you can drill a small hole in the thermostat as shown. This will allow air to escape past the thermostat so it is not trapped inside the engine block. Some thermostats come with a similar feature called a "jiggle valve." There is a small hole in the thermostat with a pin that allows air to escape.


Cooling system leaks -- Loss of coolant because of a coolant leak is probably the most common cause of engine overheating. Possible leak points include hoses, the radiator, heater core, water pump, thermostat housing, head gasket, freeze plugs, automatic transmission oil cooler, cylinder head(s) and block.
Make a careful visual inspection of the entire cooling system, and then PRESSURE TEST the cooling system and radiator cap. A pressure test will reveal internal leaks such as seepage past the head gasket as well as cracks in the head or block. A good system should hold 12 to 15 psi for 15 minutes or more with no loss in pressure. If it leaks pressure, there is an internal coolant leak (most likely a bad head gasket but possibly also a cracked cylinder or engine block).
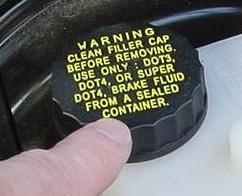
It is important to pressure test the radiator cap, too, because a weak cap (or one with too low a pressure rating for the application) will lower the coolant's boiling point and can allow coolant to escape from the radiator.
Leaky Head Gasket -- Bad news because repairs are expensive. A leaky head gasket can allow coolant to seep into the engine's cylinders or crankcase. Symptoms include a loss of coolant with no visible external leaks, and white steam in the exhaust, especially after restarting the engine when it has sit for awhile. A leaky head gasket can be diagnosed by pressure testing the cooling system, or by using a "block checker" that pulls air from the cooling system into a cylinder that contains a special blue colored leak detection liquid. If there are any combustion gases in the coolant, the color of the liquid inside the detector will change from blue to green. A leaky head gasket can often be temporarily sealed by adding a sealer product to the cooling system. But for bad leaks or ones that cannot be stopped with sealer, the head gasket has to be replaced.
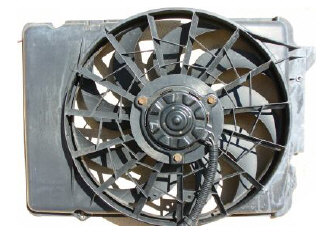
Fan Not Working -- With mechanical fans, most engine overheating problems are caused by a faulty fan clutch, though a missing fan shroud can reduce the fan's cooling effectiveness by as much as 50% (depending on the fan's distance from the radiator) which may be enough to cause the engine to overheat in hot weather or when working hard.
Defective fan clutches are a common and often overlooked cause of engine overheating. The shear characteristics of the clutch fluid gradually deteriorates over time, with an average loss in drive efficiency of about 200 rpm per year. Eventually slippage reaches the point where effective cooling is no longer possible and overheating results. (On average, the life of a fan clutch is about the same as a water pump. If one needs to be replaced, the other usually does too.)
If the fan clutch shows signs of fluid leakage (oily streaks radiating outward from the hub of the clutch), spins freely with little or no resistance when the engine is off, or wobbles when the fan is pushed in or out, it needs to be replaced.
With an electric cooling fan, check to see that the fan cycles on when the engine gets hot and when the air conditioner is on. If the fan fails to come on, check the fan motor wiring connections, fan relay and temperature sensor. Try jumping the fan directly to the battery. If it runs, the problem is in the wiring, relay or sensor. If it fails to run, the fan motor is bad and needs to be replaced.
With a hydraulic cooling fan, the fan must be turning fast enough to provide adequate cooling at idle and low speed.
Leaky Water pump -- Any wobble in the pump shaft or seepage would call for replacement. In some instances, a pump can cause an engine to overheat if the impeller vanes are badly eroded due to corrosion or if the impeller has come loose from the shaft. The wrong pump may also cause an engine to overheat. Some engines with serpentine drive belts require a special water pump that turns in the opposite direction of those used on the same engine with ordinary V-belts.
water pump erosion Cavitation damage inside a water pump
It does not happen very often, but sometimes the water pump impeller can loosen up on the pump shaft and not turn, although the water pump pulley appears to be turning normally. If the impeller does not spin, there will be little or no circulation of coolant through the engine. The only way to know if this is the problem is to remove the water pump and check the impeller to see that is is tight on the shaft. Also, some plastic impellers can become severely eroded over time. The water pump housing and/or impeller may also experience cavitation erosion. The loss of blade area or an increase in clearance between the housing and impeller will reduce the flow of coolant and can lead to engine overheating.
Slipping Belt -- Check belt tension and condition. A loose belt that slips may prevent the water pump from circulating coolant fast enough and/or the fan from turning fast for proper cooling.
Lower Radiator Hose Collapsing -- A pinched hose (upper or lower) or a lower radiator hose that is collapsing and blocking the flow of coolant when the engine is running can cause engine overheating. The lower hose usually has a metal reinforcing wire inside that looks like a large spring. It s purpose is to prevent the hose from collapsing when the water pump is pulling water through the hose. If this wire is missing or has failed due to corrosion, the hose may collapse.
*Plugged or Dirty Radiator -- Dirt, dead bugs and debris can block air flow through the radiator and reduce its ability to dissipate heat. Internal corrosion and an accumulation of deposits can also block the flow of coolant. A good way to find internal clogs is to use an infrared thermometer to "scan" the surface of the radiator for cold spots. If clogged, the radiator should be removed for cleaning or replaced. Backflushing the cooling system and/or using chemical cleaners can remove rust and hard water scale, but may do little to open up a clogged radiator.
When refilling the cooling system, be sure you get it completely full. Air pockets in the head(s), heater core and below the thermostat can interfere with proper coolant circulation and cooling. If the cooling system has no bleeder valves to vent air, you may have to temporarily loosen a heater hose to get all the air out of the system.
*Excessive exhaust backpressure -- A clogged catalytic converter will restrict the flow of exhaust and cause heat to back up in the engine. Other causes include a crushed exhaust pipe or a collapsed double wall pipe. Check intake vacuum at idle. If intake vacuum reads low and continues to drop, inspect the exhaust system.
*Overheated incoming air -- On older vehicles with a carburetor or throttle body injection, check the operation of the heated air intake system on the air cleaner. If the temperature control valve is stuck so only heated air from around the exhaust manifold is drawn into the air cleaner, it may contribute to detonation and/or engine overheating. Also check the heat riser valve for manifold heat on older V6 and V8 engines. If stuck shut, it may be overheating the intake manifold.
*Dragging brakes -- A disc brake caliper that is sticking or a parking brake that is not releasing may be making your engine work harder than normal to overcome the friction. Check the brakes and fix as needed.
*Overworking the engine -- The cooling systems in many passenger cars today are marginal and have little excess capacity to handle extra heat generated by towing or high speed mountain driving in hot weather. Replacing the original stock radiator with a larger or thicker radiator can improve cooling capacity.
Posted on Saturday, July 28, 2012 / 0 Comment / Read More

Cruise Control: What Is It?


Cruise Control: What it is and how it works.

What Is Cruise Control?

The purpose of a cruise control system is to accurately maintain the driver's desired set speed, without intervention from the driver, by actuating the throttle-accelerator pedal linkage. A modern automotive cruise control is a control loop that takes over control of the throttle, which is normally controlled by the driver with the gas pedal, and holds the vehicle speed at a set value.
Mặt đường ướt khiến dễ mất lực bám.
The driver can set the cruise control with the cruise switches, usually ON, OFF, RESUME, SET/ACCEL and COAST, that are located in the steering wheel or on the windshield wiper or turn signal stalk. On most cars the cruise control can accelerate or decelerate the car by 1 mph with the tap of the SET/ACCEL button. Hit the button five times to go 5 mph faster.
  1. The on and off buttons really don't do too much. Some cruise controls don't have these buttons; instead, they turn off when the driver hits the brakes, and turn on when the driver hits the set button.
  2. The set/accel button tells the car to maintain the speed you are currently driving. If you hit the set button at 45 mph, the car will maintain your speed at 45 mph. Holding down the set/accel button will make the car accelerate. On most cars, tapping it once will make the car go 1 mph faster.
  3. If you recently disengaged the cruise control by hitting the brake or clutch pedal, hitting the resume button will command the car to accelerate back to the most recent speed setting.
  4. Holding down the coast button will cause the car to decelerate, just as if you took your foot completely off the gas. On most cars, tapping the coast button once will cause the car to slow down by 1 mph.
  5. The brake pedal and clutch pedal each have a switch that disengages the cruise control as soon as the pedal is pressed. So you can disengage the cruise control with a light tap on the brake or clutch.
At speeds below 30 mph, the control unit will prevent application of cruise control functions and above 30 mph the driver can choose to turn it on or not. For reasons of safety, cruise control should not be used on wet or icy roads, heavy traffic or on roads with sharp bends.
Cruise control systems are designed to turn off immediately whit a slight touch of the brake or clutch pedal. Most cruise controls will cut out if you accidentally shift from drive to neutral.
Cruise control has been around for a long time. Over the years they way they control speed has been improved with better electronics. And as a consequence, have become more difficult to troubleshoot. Most car manufacturers have special testers that hook up between the cruise control module and harness to pinpoint a specific problem.
The cruise control system controls the speed of your car the same way you do, by adjusting the throttle position. But cruise control actuates the throttle valve by a cable connected to an actuator, instead of by pressing a pedal. The throttle valve controls the power and speed of the engine by limiting how much air the engine takes in. Many cars use actuators powered by engine vacuum to open and close the throttle. These systems use a small, electronically controlled valve to regulate the vacuum in a diaphragm. This works in a similar way to the brake booster, which provides power to your brake system.
Posted on Saturday, July 28, 2012 / 0 Comment / Read More

Care & Maintenance Tips


Not only does this make it more fun to own and drive, but it can also help increase its resale or trade-in value down the line.
Preserving value under the hood
Simply put, the best thing you can do for your vehicle is getting regular scheduled maintenance. An oil and filter change is the most important and most frequent maintenance you’ll need, so make certain to follow the advice of your Owner Guidefor how often it should be done. Typically, we recommend having your tires rotated and getting a multi-point inspection performed with every oil change.

Visiting the experts at your local Ford or Lincoln Dealership is the best way to keep up with your maintenance. Not only do they have the right grade of Motorcraft® oil for your needs, but they can keep an eye on everything else that helps keep your vehicle running smoothly, including your brakes, battery, steering system and more.

They’ll make it easy for you too. Using this site, you can schedule appointments,track your service history and receive maintenance updates, all online, any time.
Preserving value on the inside
The following products and accessories can help you keep your interior from showing its age prematurely:
  • Front-and rear-windshield sunscreens
    These help protect your dashboard and fabric from sun
  • Seat covers
    These can help preserve the life of your seat fabric and are available in many different styles to suit your tastes
  • Polish, cleaning and spot-removal products
    Motorcraft® offers a wide selection of cleaning products designed specifically to keep your upholstery pristine – whether you’re just cleaning or have to treat an unfortunate spill
Preserving value on the outside
Keep the correct color of touch-up paint on hand to fix any chips or scratches in your paint. You can usually find the color information you need in your driver’s-side door or in your Owner Guide. If you can't immediately apply (or get) the paint, dab the chip or scratch with some clear nail polish. The polish will prevent corrosion under the paint and resultant rust.

If you are in an accident, file an insurance claim promptly and use the claim money to repair the damage as soon as you can. Waiting can allow rust to set in and lead to other more serious problems.
Preserving value on the road
Aggressive driving can increase the wear and tear on a vehicle and decrease its resale value, so avoid tactics such as jackrabbit starts, fast stops, speeding and weaving in and out of traffic. Eliminating these driving tactics is safer, plus it can help keep your brakes, engine, tires and suspension from wearing prematurely. And if that’s not enough incentive, it can even improve your fuel economy by as much as 33%.
Preserving value with service records
Most used-vehicle shoppers are looking for (and expecting) a vehicle that’s been well cared for. That’s why it’s a good idea to keep complete records of all your maintenance, which you can do right on this website. Present these records, along with any other receipts involving parts, accessories or service for your vehicle, to a potential buyer. These records will both validate your selling price and assure the buyer that your vehicle is in the best condition it can be. 
Posted on Thursday, June 28, 2012 / 0 Comment / Read More

Do-It-Yourself Vehicle Maintenance For more your Safe


Your Ford or Lincoln Dealership is always the best place for maintaining your vehicle, but if you’re the type who doesn’t mind getting your hands dirty, here are a few safety precautions to keep in mind when performing maintenance on your own.
 
Before you start
It’s always a good idea to familiarize yourself with all the parts involved in what you’re doing (i.e. dipsticks, filters, fluids, hoses, etc.), as well as any tools you’ll need. Also, be sure to check your Owner Guide before beginning any procedure for the specific locations of the parts involved and for detailed descriptions.
Keeping it safe while working on a vehicle
Posted on Thursday, June 28, 2012 / 0 Comment / Read More

Cleaning Battery Corrosion Do It Yourself


Your battery is the heart of your engine’s electrical system and maintaining its health is crucial to keeping your vehicle running smoothly.
Here is what you can do yourself to give your battery proper care in between visits to your local Ford or Lincoln Dealership.
Precautions
  • Your vehicle's battery creates gases that are potentially explosive. Never smoke near your battery or use a match or other open flame near it
  • Keep metal objects, including watches and jewelry, away from your battery terminals – contact could create a spark and ignite the gases
  • Battery acid is caustic – use safety goggles and rubber gloves, and avoid contact with your skin, eyes, nose or mouth
  • Always make sure your engine is turned off before you check your battery
  • Never remove or damage the vent caps
  • Make sure the area you are working in is well ventilated
  • Maintenance and care
  • Keep the top of your battery clean and dry
  • Make sure that the battery connection cables are tightly fastened to the terminals
  • Check for broken connections and frayed or cut cables – these need to be replaced as soon as possible
  • Check for any other obvious signs of wear
Cleaning battery corrosion
  1. Remove the ground connection first by removing the negative (-) terminal from the post (note: older vehicles may have a positive ground)
  2. Remove the positive (+) terminal from the post
  3. Scrub any corrosion off the terminals, cables and posts using a stiff brush
  4. For tough buildup, use a solution of baking soda and water, taking special care that none gets inside the battery
  5. Reconnect the terminals in the reverse order from which you removed them, positive (+) first, then negative (-)
  6. Double-check to make sure the connections are tight and secure
  7. For more detailed information and illustrations on battery maintenance and safety precautions, be sure to check your Owner Guide.
Battery service from the experts
The Ford Motor Company-trained technicians at your local Ford or Lincoln Dealership can test your battery using the most up-to-date electrical system diagnostic equipment. If you need a new one, they have the right high-quality Motorcraft® batteries for your vehicle and driving needs in stock. Plus, they would be happy to install it for you and can take care of everything else your vehicle needs.
Posted on Thursday, June 28, 2012 / 0 Comment / Read More

Spray Painting Tips


There are so many colour options available today if you go to buy a four wheeler for yourself. Metallic black, peacock green, imperial blue metallic, vibrant red, deep-blue red, neutral grey, sunshine yellow, etc. Automobile companies have several colour combinations to offer to their customers. Have you ever thought how the manufacturers manage to get the right colour mix and how the end result is so appealing and exact? This is all the magic of spray painting, a painting technique in which a spray painting gun, pressurized paint container, compressed air system and flexible tubes are used. Spray paint is something that looks like graffiti, but it is in no close proximity to graffiti. One can say that it is a painting method invented to improve on the painting techniques, making it faster and accurate when it comes to the end result. A spray painting mechanism is used more in a professional set up, but can also be used by common man in order to protect his or her valuable objects from getting spoiled. Though simple to use, there are certain tips for spray painting that have to be followed in order to get perfect results.


Tips For Spray Painting


Choose the right place for your spray painting. Make sure that the place you choose for painting is well ventilated. It is advisable to spray paint outdoors whenever the conditions permit. Make sure that you don’t paint under direct sunlight and in hot, humid weather.
Remember to take precautionary measures while spray painting indoors and outdoors. You can protect objects from overspray by using newspapers, painter’s tape or drop clothes to cover the surrounding areas. It is better to create your own paint booth with the help of a large cardboard box.
Make sure that you prepare the surface of the object on which you are going to do the spray painting. Paint on clean and dry surfaces only. You can clean the surface with the help of household detergents. You will have to sand hard surfaces to improve the property of bonding. You can also use a primer on the surface as it helps in making the surface smooth, it seals the surface and makes sure that the desired and real paint colour is achieved.
Irrespective of the technique you will put to use for spray painting, read the directions given on the paint box properly before you start painting. Pay utmost attention to the safety tips and recoat numbers. It is advisable to stick to the label directions and warning when using any paint. Abiding by the instructions will give out the desired quality of work.
Make sure that you test your spray paint before using it. Shake the can before using the paint and test it with different spraying techniques on a piece of a scrap material. This will give you the best choice of technique and paint that you can use over a particular surface.
Once you have gone through the instructions and have tried your paint on scrap, take your object and start applying multiple thin coats instead of one thin coat of paint. Release the button of the machine after every pass or coat of paint. Each pass should overlap the other in a side-to-side motion in order to get the best results out of your spray painting.

After the first coat on your object, check the instructions on the paint can for recoat window. It will tell you the exact time gap between two coats of paint. After you have applied all the successive coats of paint, do not touch the object or the surface till the time it is completely dry.
Make sure that you clean the spray valve by turning the cans upside down and spraying for a few seconds, before storing the cans for future use. The cleaning will prevent clogging in the spray tip.

Posted on Tuesday, June 05, 2012 / 0 Comment / Read More

How To Remove Paint From Car


Owning a four wheeler is the dream of many a middle income families, a necessity for a big family, a status symbol for a business man and a sheer display of power and luxury for a millionaire. Irrespective of the purpose, a car is a man’s most prized possession and caring for it needs to be his priority. However, accidents are inevitable and what can be more depressing to see your pride on wheels out of shape or color? A wrong paint job can make your car look very unattractive and unlikable. It might so happen that while painting your car or applying a touch up, some other areas might get painted leading to an uneven look. Sometimes the paint might even spill accidently over your car. All these situations require the paint of your car to be stripped off completely. Nevertheless, removing the paint from the car in the right way is what will help give your car the desired finish. Mentioned below are a few tips on removing paint from a car effortlessly and correctly. Read on to learn more.


Removing Paint From Car


Removing Paint Using Soapy Water
Prepare a bucket of lukewarm soapy water to strip out the paint from your car. Use only a mild detergent or a car wash shampoo for the purpose. Take a dish washing scrub, dip it in the soapy water and scrub it over the paint meticulously. This is one of the most effective methods to get rid of the spray paint from the car. The sooner you try this method after painting, the finer the result will be.


Removing Paint Using Paint Thinner
A paint thinner can also be used effectively to get rid of the paint from your car’s body. You can make use of kerosene, turpentine, gasoline or even a nail polish remover to get rid of the paint from your car. Pour out one of these thinning solutions onto a clean cloth and rub it over the area you want to remove the paint from. You will notice the paint getting transferred to the cloth. Continue rubbing the cloth with the thinning agent to get rid of the paint entirely. If you notice that the colour is not getting transferred to the cloth, it means to say that the thinner is insufficient.


Removing Paint Using Rubbing Compounds
If your car is coated with acrylic or lacquer paint, you will have to make use of this method. Make use of a good quality car rubbing compound and a buffer not over 2500 to 3000 rpm. A buffer higher than 3000 rpm might burn the paint, leaving behind ugly marks especially in case of dark colored cars. You have to apply the rubbing compound first and then use a buffer. This method is also useful in removing paint scratches from the car.


Removing Paint Using Sand Paper
You can also make use of 800 grit sandpaper to remove the paint from your car’s body. Sand the paper continuously over the paint for few minutes. Now take 1000 grit sandpaper and rub it continuously for few minutes. Next you will have to repeat the process with 1500 grit sandpaper and then a 2000 grit sandpaper to get rid of the paint completely. You can also use wet sandpaper effectively for the job.


Removing Paint Using Media Blasting
Media blasting is another useful way to strip off paint from your car. However, you will have to remove glass and rubber fixtures from the vehicle as the media blasting might cause damage to these objects. There are different types of media available such as the ‘glass beads’; ‘baking soda’, ‘sand’ etc. Choose the one that best suits your requirement. Fill in the media blasting equipment with the media of your choice and spray it over your car at a consistent speed. This process should be carried out in a well ventilated area as this process generates a lot of heat.


Removing Paint Using Chemical Stripping
Chemical stripping should also be carried out after removing all the glass and rubber fixtures from the car. Pour a sufficient amount of aircraft stripper on the surface you want the paint to be removed from and let it stand for a minute. This will cause the paint to eventually lift which can later be removed using a putty knife.


Usually you need something with a little abrading ability to bite into and move the transferred paint off the original paint. The safest way to go would be to apply some ScratchX with either a microfiber applicator or a peice of terry cloth towel and put a little passion into it. You need a fiber type applicator because it offers a little more bite than a foam applicator which will tend to glide over the paint versus kick it off.


If that is too gentle then something that has worked for me is using our M04 Heavy Cut cleaner with a peice if terry cloth as the M04 Heavy Cut Cleaner uses a fairly aggressive diminishing abrasive that you can easily feel with your fingers. What this diminishing abrasive does when worked against the transferred paint is to bite into it and remove it. The problem is however that this is a product intended to be applied with a rotary buffer only and it will tend to scratch and mar the finish when applied by hand. The way I've used it successfully is to remove the transferred paint, and then remove any scratches, dullness or marring left by the M04. I usually do this with a rotary buffer.


The end result is the transferred paint is removed and gloss is restored. I know this can sound sort of like a backwards approach but it's the larger size diminishing abrasive characteristic of the #4 Heavy Cut Cleaner that you are leveraging to remove the transferred paint as this can sometimes be what it takes to successfully do this.


I have some pictures of doing this exact same thing off a black bumper on a BMW I can try to find and post.

Safest thing to try, and first thing to try however is the ScratchX by hand using a fiber type applicator. If you find your aggressive rubbing with the fiber type applicator removes the transferred paint but leaves some marring then you can come back and remove the marring by re-applying the ScratchX only switching to a foam applicator for this procedure.


Always use the least aggressive product to get the job done and be ever mindful that simply changing product, applicator material or application process can change the aggressiveness of the procedure.
Posted on Tuesday, June 05, 2012 / 0 Comment / Read More

Why we need to change Brake Fluid?


Brake Fluid is a hot topic because most people don't know why it should be changed. Did you know the average motorist who drives 10,000 to 15,000 miles a year uses his brakes about 75,000 times a year? Did you know that nearly half of all motorists in a recent Car Care Council survey said brake failure was their number one fear amongst driving emergencies?


So consider this: After three years of service, the average boiling point of the brake fluid has dropped to a potentially dangerous level because of moisture contamination and may not meet minimum federal requirements for brake fluid.


Probably half of all cars and light trucks that are 10 or more years old in the U.S. have never had their brake fluid changed. Yet in many European countries, regular brake fluid checks are required, and half of all cars routinely fail such tests. That's a good case for changing brake fluid.


REPLACE BRAKE FLUID
Brake fluid is one of the most neglected fluid in vehicles today, yet is vitally important for safe driving. Consequently, professional technicians should be checking the fluid and recommending that the brake fluid be changed if it is contaminated. The issue is old brake fluid may not be safe if moisture contamination is above a certain level.


BRAKE FLUID PREVENTIVE MAINTENANCE


Many experts have long recommend changing the brake fluid every year or two for preventative maintenance. Their rationale is based on the fact that glycol-based brake fluid starts to absorb moisture from the moment it is put in the system. The fluid attracts moisture through microscopic pores in rubber hoses, past seals and exposure to the air. The problem is obviously worse in wet climates where humidity is high.


After only a year of service, the brake fluid in the average vehicle may contain as much as two percent water. After 18 months, the level of contamination can be as high as three percent. And after several years of service, it is not unusual to find brake fluid that contains as much as seven to eight percent water.
Brake Fluid Chart


An NHTSA survey found that the brake fluid in 20% of 1,720 vehicles sampled contained 5% or more water!


As the concentration of moisture increases, it causes a sharp drop in the fluid's boiling temperature. Brand new DOT 3 brake fluid must have a dry (no moisture) boiling point of at least 401 degrees F, and a wet (moisture-saturated) boiling point of no less than 284 degrees. Most new DOT 3 fluids exceed these requirements and have a dry boiling point that ranges from 460 degrees up to over 500 degrees.


Only one percent water in the fluid can lower the boiling point of a typical DOT 3 fluid to 369 degrees. Two percent water can push the boiling point down to around 320 degrees, and three percent will take it all the way down to 293 degrees, which is getting dangerously close to the minimum DOT and OEM requirements.


DOT 4 fluid, which has a higher minimum boiling temperature requirement (446 degrees F dry and 311 degrees wet) soaks up moisture at a slower rate but suffers an even sharper drop in boiling temperature as moisture accumulates. Three percent water will lower the boiling point as much as 50%!


Considering the fact that today's front-wheel drive brake systems with semi-metallic linings run significantly hotter than their rear-wheel drive counterparts, high brake temperatures require fluid that can take the heat. But as we said earlier, the brake fluid in many of today's vehicles cannot because it is old and full of moisture.


Water contamination increases the danger of brake failure because vapor pockets can form if the fluid gets too hot. Vapor displaces fluid and is compressible, so when the brakes are applied the pedal may go all the way to the floor without applying the brakes!


In addition to the safety issue, water-laden brake fluid promotes corrosion and pitting in caliper pistons and bores, wheel cylinders, master cylinders, steel brake lines and ABS modulators.


FLUID RELATED BRAKE FAILURES


From time to time we hear about reports of "unexplained" brake failures that caused accidents. When the vehicle's brakes are inspected, no apparent mechanical fault can be found. The fluid level is normal, the linings are within specifications, the hydraulics appear to be working normally and the pedal feels firm. Yet the brakes failed. Why? Because something made the brakes hot, which in turn overheated the fluid causing it to boil. The underlying cause often turns out to be a dragging rear parking brake that does not release. But that's another story.


The same kind of sudden brake failure due to fluid boil may occur in any driving situation that puts undue stress on the brakes: a sudden panic stop followed by another, mountain driving, towing a trailer, hard driving, etc.


A case in point: A child was killed in an accident when the five-year old minivan with 79,000 miles on it his parents were driving suffered loss of pedal and crashed while the family was driving in the mountains of Washington state. Fluid boil was blamed as the cause of the accident.


OEM BRAKE FLUID RECOMMENDATIONS


What do the auto makers say about fluid changes? General Motors and Chrysler do not mention brake fluid in their scheduled maintenance recommendations. A General Motors spokesman said Delco Supreme 11 DOT 3 brake fluid contains additives than many other brake fluids do not, so it is essentially a lifetime fluid. Starting in 1993, GM began using a new type of rubber brake hose with an EPM lining and outer jacketing that reduces moisture penetration by 50%. So GM does not consider fluid contamination to be a significant problem.


Ford, for a time, recommended fresh fluid every 36,000 miles or three years, and to replace the fluid each time the brake pads are changed. Currently, however, Ford specifies no specific time or mileage recommendation for changing the brake fluid.


As for Chrysler, the only recommendation they publish is to change the fluid every 24 months on their Sprinter van.


A number of import car makers do recommend brake fluid changes for preventive maintenance at specific time/mileage intervals:


Acura: 36 months
Audi: 24 months
BMW: 24 months, or when indicated by Service Inspection Indicator
Honda: 36 months
Jaguar: 24 months all models except 2009 XF (36 months)
Land Rover: 36 months
Lexus: 36 months or 30,000 miles, which ever comes first
Mercedes-Benz: 24 months
MINI 24 months
Saab: 48 months (all models except 9-7X)
Smart: 24 months or 20,000 miles, which ever comes first
Subaru: 30 months or 30,000 miles (normal service) or 15 months/15,000 miles (severe service)
Suzuki: 24 months or 30,000 miles, which ever comes first (Forenza & Reno), 60 months or 60,000 miles (Grand Vitara and SX4)
Volkswagen: 24 months (New Beetle, City Gold, City Jetta), 36 months (all other models except Routan)
Volvo: 24 months or 37,000 miles (Normal), or 12 months (severe service)
Source for fluid change recommendations: Vehicle Manufacturer service information & owners manuals
If motorists would only follow this simple advice to change their brake fluid periodically, they could greatly reduce the risks associated with moisture-contaminated brake fluid. You can extend the life of your brake system and likely save yourself a lot of money in the long run on grake repairs, especially if your vehicle is equipped with ABS (because ABS modulators are very expensive to replace!).


TESTING BRAKE FLUID


Since you can't tell how badly contaminated brake fluid is by its appearance alone (unless the fluid is full of rust or is muddy brown), the fluid should be tested unless you are changing it for preventive maintenance or as part of a brake job.


There are three ways to check the condition of the brake fluid:
optical refractometer for checking brake fluid
An optical refractometer will clearly show the amount of moisture in the brake fluid. A small drop of fluid is placed in the tester, then the tester is held up to a light to read the amount of contamination. This tester is extremely accurate and shows both the percent of moisture and the fluid's boiling point. A source for this type of tool is Misco or Reichert.

Chemical test strips. A chemical test strip made by Phoenix Systems (888-749-7977) www.stripdip.com called "Strip Dip" can reveal the condition of the corrosion inhibitors in the brake fluid. The FASCAR chemicals react to the presence of copper in the fluid. The test strip changes color to reveal the condition of the fluid. When copper levels reach 100, it indicates the corrosion inhibitors are nearing the end of their life. If the copper level is 200 or higher, the corrosion inhibitors are worn out and the fluid needs to be changed.


Electronic brake fluid testers actually measure the fluid's boiling point. The test takes only about a minute and is quite accurate. If the fluid's boiling temperature is getting dangerously low, replacement is recommended to minimize the risks of pedal fade caused by fluid boil. Sources for electronic brake fluid testers include Alba Diagnostics, MISCO and OTC.
CHANGING BRAKE FLUID


 When the fluid is changed, use the type of brake fluid (DOT 3 or 4) specified by the vehicle manufacturer. The cap on the fluid reservoir will usually indicate what type of brake fluid is required. You can also find this information in your Owners Manual (look under brake fluid).


As any brake fluid supplier will tell you, brake fluid is NOT a generic product. Just because a fluid meets the minimum DOT 3 or DOT 4 specifications does not mean it can tolerate moisture or provide the same degree of corrosion protection as another brand of fluid.


Raybestos, for example, sells a "Super Stop Super High Performance" DOT 3 fluid with a dry boiling point of 550 degree F, which meets Ford's latest requirements.


There are also high temperature glycol based DOT 5.1 brake fluids (not to be confused with DOT 5 which is silicone based). The dry boiling temperature rating for DOT 5.1 is 518º F or higher, and the wet boiling temperature rating is 375º F or higher. Some racing brake fluids exceed the dry boiling temperature rating, but may only meet the wet boiling temperature requirements for DOT 3 fluid (284 degrees).
brake fluid reservoir cap
So the next time you are inspecting or servicing your brakes, be sure to check the condition of the fluid as well as the level. If you add or change fluid, use type specified by the vehicle manufacturer (DOT 3 or 4) and use the highest quality fluid you can get. And above all, remember the benefits of changing the brake fluid for preventive maintenance.


Posted on Monday, May 28, 2012 / 0 Comment / Read More
 
Copyright © 2011. CHEVROLET AFTERSALES . All Rights Reserved
Home | Company Info | Contact Us | Privacy policy | Term of use | Widget | Site map
Design by Herdiansyah . Published by Borneo Templates